Thursday, September 30, 2010

(kind of weak) Month in Review: September

Usually when I put together month-in-review posts, I'm amazed at how much crafting has taken place during the month - even when it seemed like not much at the time.  September was busy - I came off a bit of a summer blogging hiatus - so when it came to putting together this month's review I was excited to see what I'd accomplished.  Well, folks - it's not a lot!  Not compared to other months at least!  Ah well, sometimes there's lots of time to craft and sometimes there isn't - guess this just wasn't my month!

Here's a recap, nonetheless, of a few projects from Ready, Set, Craft! during the month of September:

There was a lot of baby stuff going on, from cards to baby bibs to packaging.  Oh, and a great guest post for a diaper wet bag by Arwen!


There was some card marking this month.  I've loved all of my stamping workshops and togethers over the past month.  Thanks to hostesses Sue and Lindsey, and to everyone who came out to stamp a stacks and workshops.  So much fun!


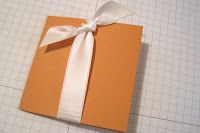
There was a special box for a special little guy...


And of course a month can't go by on Ready, Set, Craft! without some cupcakes!  We celebrated the 1st Anniversary of the Cupkins project and I made some Michigan State football themed cupcakes!


For more info on any of these projects (and more!) head to the September archives... --------------------->

What about you, reader?  How has your crafty mojo been lately?  Was September a productive month for you?  Or are you ready to start fresh in October?

Wednesday, September 29, 2010

Halloween Project Ideas

I've got Halloween on the brain!  I'm working on my next kids craft article for Babble.com and all kinds of projects and gifts for my home and friends.  Here are a few clever Halloween projects from around the web that I've found inspiring...


Have a neat Halloween project to share?  Leave us a link in the comments!  And don't forget that our Halloween edition of Cupkins is coming up on Monday - get planning and baking and get ready to join our link party!

Tuesday, September 28, 2010

TGI-Tuesday?

Phew!

The weekend was such a busy one that it took all of Monday for me to regroup, reorganize, and get back on the wagon!  I spent two days over on the east side of Michigan hosting a stamp a stack for my stampers over there and doing a workshop for wonderful hostess, Sue.  There was lots of stamping and lots of socializing - but also lots of driving for me - which was the only downside to the weekend!

Here are a few picks of Sue's workshop guests working away on their make and take projects...


And of my East Side Stampers working away on their Halloween cards at the stamp a stack...


All of this stamping has got me thinking about the holidays for sure!  I'll have a few Halloween projects to share with you this week, and then I'm already thinking about Christmas!!!

(I've been stamping away making up Christmas card samples for my customers!)

How about you?  Are the holidays on your mind, or is it too early to start planning?

Friday, September 24, 2010

Halloween-themed First Birthday Party Invites

This week I had the pleasure of working with fellow blogger, friend and crafty gal Arwen (catch her guest post on RSC here and check out her mommy blog here,) on some first birthday invitations for her little boy.  She's doing a Halloween themed birthday party and it's going to be so very cute!

We used the Spider Web embossing folder for the Big Shot machine (seriously my favorite holiday product thus far!) and cardstock in Tangerine Tango, Basic Black and Whisper White.


The little vampire stamp is from the Fang-tastic stamp set.  So very cute!  Arwen did a great job watercoloring all of the images using an Aqua Painter and inks in Tangerine Tango, Old Olive, Basic Black and Rich Razzleberry.
On the inside we used the spider from the Batty for You stamp set to create a spooky effect.

Thanks so much for allowing me to help you create these invitations, Arwen!  Can't wait to come up with some equally cute thank you cards for you!  Have a great birthday party!

Thursday, September 23, 2010

Stamp Set Spotlight: Because I Care

As a Stampin' Up! demonstrator I love sharing stamping with crafters seasoned and new.  One wonderful way that I get to do this is by going out to peoples' homes and doing workshops.  I get to meet some great people and introduce them to Stampin' Up! and I always have a blast.

After each workshop, once people have received their orders, I like to send a card to each of my new customers - thanking them once again for their order and making sure they have my contact information in case they have any questions about their products, or would like more information about Stampin' Up!

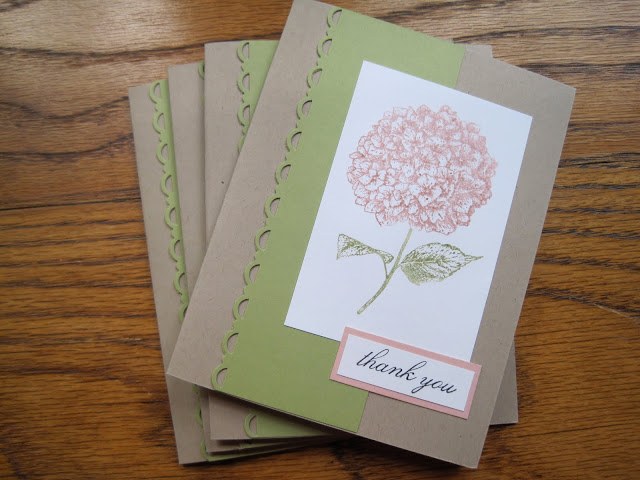
For my September workshop attendees I used the "Because I Care" level 1 hostess stamp set to make some simple cards.  I just love the big beautiful hydrangea stamp - so pretty!
 

I used Crumb Cake cardstock for the card itself, then Pear Pizzazz, Blushing Bride and Whisper White cardstock pieces for the highlights.  I used the Scallop Trim Border Punch on the piece of Pear Pizzazz cardstock, and colored the main image with Blushing Bride and Pear Pizzazz Stampin' Write markers.

You can find all of these materials (and more!) in my online Stampin' Up! store, and you can earn your own "Because I Care" stamp set by hosting a workshop of $150 or more.  If you're a Michigander, I can squeeze in just a couple of additional workshops before the holidays - if you're interested just let me know!

Happy Thursday!

Wednesday, September 22, 2010

Giveaway Winner, September Cupkins + October Link Party Info!

For September's edition of Cupkins, Meg and I chose Football as our theme!  I don't know about you - but September 1 hit and my husband has been firmly planted on the couch with a football game on ever since!  Okay, I exaggerate, but we all know that football is a big deal at this time of year - and even though I'm not a huge fan of the sport myself, I do love having people over for the games and enjoying some tasty football grub!

Here's what we came up with... my "Game Day Cupcakes" and Meg's "Chili Cheese Cornbread Mini Muffins"


Game Day Cupcakes How-To:

I love these cupcakes because they're so festive - and you can customize the colors for whatever team(s) are playing!  My husband is a big Michigan State University fan, so I went with green and white for this batch!

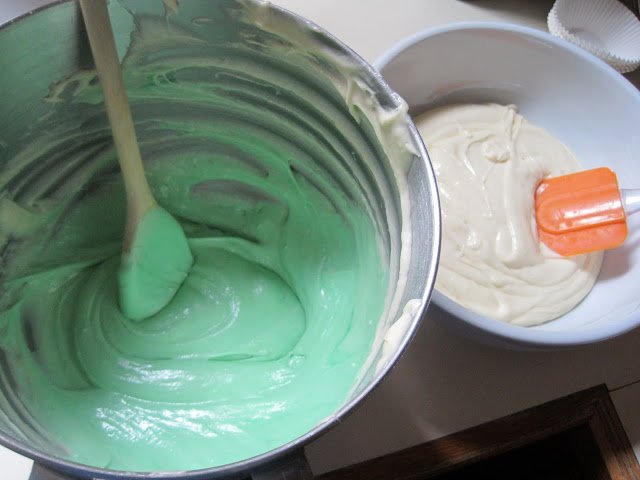
Combine one box of vanilla cake mix with three eggs, one stick of butter (melted) and 1 cup of water in a stand mixer.  Divide the batter in half and color as desired.


Fill cupcake liners 3/4 full, including some of each batter.  Using a knife or toothpick, swirl the two colors of batter around in the liner to gently combine.


Bake cupcakes for about 15 minutes at 350 degrees - one tray at a time.  Keep a close eye on them - you want them to bake all the way through but not brown - it ruins the color.  And be sure to use white cupcake liners so you can see the swirls of color going through the cupcakes!

For the frosting, combine one large jar of marshmallow fluff (in the ice cream topping aisle) and three sticks of softened butter in a stand mixer.  Once combined, add 2 tsp of vanilla extract.  With stand mixer on low, gradually add poweder sugar until desired texture is reached (generally about 1 - 2 cups, but I always eyeball it)  Seperate into two bowls and color with food coloring.


One your cupcakes are cooled completely (look how pretty!) you're ready to frost...


Pipe one and a half circles of one color frosting using a 2D or 1M large tip.  Switch colors (goes without saying, but you'll need two piping bags and two matching tips for this - since you'll be alternating between) and complete the swirl.  I'm a big frosting girl - so I piled it high, but you can use less frosting and keep your swirls closer to the cupcake if you like!


Top with sprinkles in corresponding colors.  Even if that means donning gloves and picking through the Christmas red, white and green sprinkles to get out the green and white ones...  : ) 

If you wanted to get fancier still, you could create little flags on the end of toothpicks with your teams logos or name on them.  The possibilites are endless!


Let me know if you try these - I'd love to see photos of different team cupcakes!

Next month is the first month in our Cupkins link party, it will be held on Monday October 4 - and the theme is Halloween!  We'd LOVE to have you play along!  All you have to do is share a photo, tutorial, recipe, or decorating tip for a Halloween inspired cupcake or muffin on your blog, then head over to Meg's blog to link it up to our Cupkins party.  I can't wait to see what you come up with!

And finally, it's time to reveal the winner of Monday's Cupkins Anniversary Giveaway!  The Random Number Generator chose...

ERIN RUSSELL!

Drop me a note at readysetcraft@yahoo.com Erin, so you can claim your cupcake stamp set and ink pad! 

And don't forget to head over to Meg's place to check out her savory mini muffins perfect for a game day snack, and to find out the winner of HER contest!

Monday, September 20, 2010

Cupkins Year-In-Review, and Anniversary Giveaway!

It's crazy to me to think that this month, Meg at MegaCrafty and I are celebrating the first anniversary of our Cupkins collaboration.  In case you've been under a rock for the past year (or at the very least, are new to this blog!), Meg and I join forces on the first Monday of the month for Cupkins.  We pick a theme or ingredient and share a both a cupcake and a muffin recipe with you.

We've had a great time over the past year, sharing our recipes and ideas with you.  Thank you all for your lovely comments, and for the Cupkins features on other blogs.  Let's take a look back on the past year in Cupkins - in case you missed anything!


(top to bottom, left to right)

When thinking about the year ahead, we knew we wanted to continue with our collaboration - but make it even bigger and better!  Here's where you come in!

We're going to turn Cupkins into a link party!  Meg and I will now announce the Cupkins theme a month ahead of time and decide on a post date(usually the first Monday of each month, unless there is a holiday).  We'll take turns hosting the link party each month.

We'd really love for anyone who's been following Cupkins, or is new to Cupkins to join in the fun! Share your creativity, link up with a picture, a recipe, a how-to for a cupcake or a muffin that fits the theme.  Stay tuned for more details - we'll announce the October link party details on Wednesday!

And finally, in celebration of Cupkins' Anniversary, both Meg and I are hosting giveaways!  To enter mine, all you have to do is leave me a comment with an idea for a theme/ingredient for us to feature during the next year of Cupkins!  I'm giving away this sweet stamp set from Stampin' Up! and a super cute pink ink pad.  Once you've left a comment here, jump on over to Meg's place to enter HER giveaway!  Two chances to win!


For extra entries, let me know that you are (or become a) follower, and/or link to this contest via Twitter.  I'll announce the winner on Wednesday, via random number generator!  Entries will be accepted through midnight EST on Tuesday the 21st.T

hanks for reading - and following along on our Cupkins journey!  Good luck!

Thursday, September 16, 2010

Welcome to Grand Rapids!

My husband's cousin and her husband recently moved from the east side of the state here to Grand Rapids.  We are super excited to have them so close!  We're looking forward to getting together with them to check out their new digs, and I put together a little something as a welcome gift.


They're both into breweries and local beer, and Grand Rapids has an assortment of both.  I picked up a selection of beers from local brewery Founders, and attached a little notecard.  The notecard took me all of five minutes to make...


I stamped the image I wanted ink black ink on a scrap of white cardstock, then heat-embossed it with clear embossing powder and my heat took to give it some texture.


I colored in the image using a couple of Stampin' Write Markers (in Pear Pizzazz and Peach Parfait)


I cut a piece of Peach Parfait cardstock 3 inches wide by 6 inches long and folded it in half.  I used some Whisper White satin ribbon and tied it around the card.  I then trimmed my stamped image to 2x2 inches square and attached it to the front of the card.  Done!

I hole punched the corner of the card and attached it to the beer with lots of that fun curling ribbon.  Love that stuff - very festive!


Have a great day!  And in case you missed it yesterday - be sure to check out yesterday's guest post by Arwen!

Wednesday, September 15, 2010

I should've named this week "Baby Week"!! - Weg Bag Tutorial by Arwen

New Momma, and real life/blog friend Arwen (check out her blog HERE) has been making these adorable wet bags lately for baby gifts - and since baby gifts have been on my mind I thought I'd have her do a guest tutorial for us.  So without further ado, here's Arwen!

If you're like me, you know about a gazillion people who are pregnant, or who just had a baby. Having had a baby 11 months ago, I was getting a little bored with the traditional baby gifts. Inspired by using cloth diapers and some cute wetbags I saw for sale, I decided to try and make some to give as gifts.

Here is what you will need for this project: -1/2 yard of printed fabric -1/2 yard of PUL fabric -1, 14" zipper in the color of you choice -1 spool of matching thread -a walking foot for your sewing machine.

Let's get started!

First, you will need to cut your printed fabric so it is 34" long by 16 1/2" wide. Then, cut the PUL fabric so it is 36" long by 17"wide. Once you have done that, put the 2 pieces of fabric together. You want the wrong side of the printed fabric to be touching the non-shiny side of the PUL fabric. It should look something like this:

CIMG1919

Pick one side at the top, fold down the 2 layers of fabric to form a nice crease, and line your zipper up so that there is approximately 1/2" of printed fabric showing on either side. Pin one side of your zipper to this and sew straight across. I find it easier to first pin my seam, and then go through and add the zipper to the pinned seam.

 CIMG1920

CIMG1921 

Once you have sewed the first side, unzip the zipper, and repeat the same steps with the other side. After the zipper is sewed on, set the bag aside, it is time to work on the handle! For the handle, you can make it however big or small you would like. I chose these dimensions because of the print that I wanted to show, but I normally prefer to have a much smaller handle on the bag. I cut, from the printed fabric, a strip that was 19" long by 4.5" wide. Fold in half so the right sides are facing in. Pin along the outer edge and sew. Just sew the seam, do not sew the ends shut.

CIMG1924 

Once it is sewn, turn the handle right-side out. Now, take your bag and turn it inside out, so the printed fabric sides are touching, and the shiny PUL fabric is on the outside. Pull back one side of the bag, and lay the handle down so the handle is facing towards the other side of the bag and pin in place:

CIMG1925 

This may get confusing, so bear with me, I'm not an expert sewer, so I apologize. You want to sew the handle into the bag, but only sew down to the end of the handle and then stop. PUL fabric is stretchy, and when you sew the PUL fabric with the shiny sides out, it tends to bunch. This is not a problem, except if you try to sew the PUL fabric, with the printed fabric together to finish the seams and the bag, your material will also bunch. Since the PUL fabric is going to be on the inside, we need to close the printed fabric and PUL seams individually. This way, the printed fabric will not bunch, and when the PUL does, no one will be able to see it. If you're still with me, here's how I did it. Pull back your PUL fabric, to expose only the printed fabric. Do you see the red thread on the PUL where I sewed the handle? Match up that seam with where you will start and sew the printed fabric only.

CIMG1926 

Then go ahead and sew the PUL fabric on that side. Go to the other side and repeat. It should look something like this:

 CIMG1927

and here is an example of the bunching that will always happen, but no one looks inside because that's where the dirty diapers go :)

 CIMG1928

Turn the bag inside out, or right side out, et voila! You have just made a wetbag!!

CIMG1929