Monday, August 31, 2009

Appliqued Baby Onesie Tutorial

I got to work on my sewing machine this weekend and appliqued some onesies using this darling turtle fabric I found at my local fabric store.


It's a relatively quick and easy way to dress up a onesie, tee shirt, tank top, or any other item of clothing you look, and I was really pleased with my results. I hope that you enjoy the tutorial!


Appliqued Turtle Onesie

Select the item to applique, wash and press.


Cut a swatch of your fabric containing the pieces you want to applique. It doesn't have to look pretty! Make sure that your fabric has been washed and pressed.


Cut a piece of "No Sew" transfer paper the same size as your fabric swatch.


Iron fabric and "No Sew" together (rough side of "No Sew" to back side of fabric)


Allow to cool, then cut out your appliques.


Peel off the back of the "No Sew" to reveal smooth side.


Place appliques on garment and iron on per "No Sew" instructions


Once cooled, position garment and sew, slowly, around the outside, stopping frequently to reposition and turn garment as needed.


Once removed from sewing machine, you will have unfinished threads in the front of the garment.


Carefully sew threads through to the other side.


Sew threads underneath machine stitches carefully, then trim off ends. If you wish - use some "No Fray" to secure ends.


The finished back side will look like this!


Ta da! You're done! How do you like my super cute turtle onesie?


Friday, August 28, 2009

Cupkins & Contest Winners!

Thanks to those of you who entered my contest! It was a tough decision but the winners are...

ARWEN

&

TIM MILLER

CONGRATULATIONS! Arwen and Tim have each won 200 custom postcards from UPrinting. Yeah!

Winners, please e-mail me (joanneroehm@yahoo.com) with your mailing address and e-mail address by the end of the day Monday. If I don't hear from you by then, I'll select another winner in your place. Again, thanks to you all for entering - I'm working on another contest coming soon so be sure to enter that, too!

And now, what you've all been waiting for!

Introducing...

Meg at Mega•Crafty and Joanne at Ready, Set Craft! have teamed up to bring you the ultimate collaboration of baked goods: Cupcakes and Muffins! On the first Monday of each month, hop on to one of our blogs to see this month's featured ingredient and/or theme and view our mouth watering recipes! Meg will entice you with her delicious muffins while Joanne will lure you in with a sweet and sugary cupcake. Simply click on the Cupkins logo to switch between sites and enjoy both recipes!

A little about muffins and cupcakes:

What's the difference? Well just by looks- cupcakes are usually frosted and muffins are not. Recipe wise butter seems to be the biggest difference. Muffins don't usually have butter in the batter while cupcakes do. Also muffins usually have nuts or fruit, instead of ingredients like chocolate or candy. Think of cupcakes as being a little cake while muffins are more like a quick bread. But really isn't it just a way to eat dessert twice a daywithout feeling too bad?!

September's ingredient is APPLE! Think Fall, apple orchards, and back to school time! Join us on Monday September 7 for our Cupkins debut!

A little about us:

Meg:
I love making things and I'm always up for trying a new craft (my packedstudio shelves are proof of that)! You'll find me blogging on everythingfrom knitting, kids crafts, and card making to my newest adventures inglass blowing, yarn dying and spinning. I started Mega•Crafty at thebeginning of 2009 as a way to be involved with a larger creativecommunity. It's also been a great way to help me stay creative on aregular basis.

I live with my husband, our dog and two cats. My favorite color is teal.

I'm a Creative Director by Day. My favorite holiday is Halloween and I've recently started new new blog, Mega•Spooky dedicated to all things Halloween

Joanne:
Joanne started Ready, Set, Craft! about a year ago as a creative outlet and way to connect with other artisans and crafters world wide.

An avid paper crafter and cupcake connoisseur, Joanne has recently started to dabble in yarn and sewing crafts - and is loving it! Joanne has taught art, craft, and fashion/jewelry classes throughout West Michigan, and enjoys encouraging creativity in all those around her - young and old!

Joanne holds a BA in Music, and is currently a full-time graduate assistant majoing in Public Administration and Non-Profit Leadership.

Joanne is a demonstrator for Stampin' Up! and lives with her husband, dog, and two cats in Grand Rapids, Michigan.

Can't wait until September? Here's a little taste of what to expect each month from CUPKINS...

Toy Store Cupcakes: Vanilla Cupcakes with Vanilla Frosting and Toys on Top!


For the Cupcakes... (makes 30)

3 1/4 cups cake flour

1 1/2 tbsp baking powder

1/4 teaspoon salt

7 oz unsalted butter

1 3/4 cups sugar

1 cup + two tbsp milk

1 tbsp vanilla

5 large egg whites

Preheat oven to 350. Whisk dry ingredients. Cream butter and sugar in a mixer until light and fluffy.

Reduce mixer speed to low, add dry ingredients to butter and sugar alternating with wet ingredients in three additions.

Beat egg whites until stiff peaks, then fold into batter.

Place in cupcake tins lined with liners immediately and bake for approx. 22 minutes.

Once cooled, top with vanilla frosting (colored if you wish!) and with small toys (like those for kids party bags from a party supply store.

If serving to young children, make sure they know that the toy is to PLAY with - and not to EAT! : )

Want another recipe? Hop on over to Mega•Crafty to see more! Click on the Cupkins logo below!


(I recently made the toy store cupcakes for an event... check out the pics!)


Busy Week!

Hi Everyone!

It's been a busy week with not as much time for crafting as I would have liked!

I am, however, almost finished with a darling appliqued onesie that I'll get posted on here soon, and have some cupcake photos and the beginning of the CUPKINS collaboration to share this weekend.

As if that wasn't enough... today is the LAST DAY to enter my contest! It's not too late to enter - but you don't have much time! I'll be deciding winners at 12 midnight EST and announcing the lucky guys or gals tomorrow morning! Head over HERE to enter and leave a comment!

Plus, I'm heading to the East side of the state this afternoon to have a crafty / sewing weekend with Mum - so who knows what I'll come back with for you next week!

So while we wait for me to get my act together and post some projects, tell me - what's new in YOUR crafty world? Leave me a comment about what you're working on, leave a link to your blog, or tell us about someone else's blog or something neat you've seen around the blogosphere. I know I love me some great craftiness!

Have a wonderful weekend - check back tomorrow morning for news and the contest winners!

Tuesday, August 25, 2009

Cake Class Part 2

Tonight was the last night of our four-part cake course through Wilton / Hobby Lobby. I didn't post after last week's class because honestly (and unfortunately?) - there wasn't much to talk about. This week, we learned how to make sweet peas and bows. As you can see, I got the sweet pea down - but the bows were another story.


Then, for our "final project" we decorated a cake using some of the techniques we learned. Neither Heather or I were very good at the "Wilton roses" we had learned to make (to be honest, we kind of blew the roses off... we're slackers like that) so we chose to do a cake using drop flowers and leaves. We did very similar cakes. Here's Heather intently focused...


And here's my finished cake... ta da!


And here we are with our final products looking just a little TOO excited!


Overall, I'm glad we took the class. If nothing else, it reinforced to me that I like to make CUPCAKES. No big fancy cakes for me! We learned some basic techniques that will translate into cupcaking - and we're good on cake classes for now!

PS) Today I became a demonstrator for STAMPIN' UP! I am VERY excited! I'll post more about it soon, but let me know if you'd be interested in joining my STAMPIN' UP mailing list! : )

Monday, August 24, 2009

SEW WHAT?!

I FINALLY got it! My first sewing machine! Woo hoo!


I received my sewing machine this weekend from my parents for a birthday gift and I'm SO (SEW!) excited! So excited in fact that I don't have time for a real post... I'm too busy working on sewing projects to share with you. Getting the hang of threading the thing was a little hairy - but everything else is going splendidly.

Any of you sewers out there have any great ideas to add to my list of beginner projects to tackle? Leave a comment!

Friday, August 21, 2009

Cupcakes & Contest


Sorry I've been a little quiet over the past couple of days. Heather and I have been baking and frosting our little hearts out. We're perfecting cupcake recipes, frostings, and garnishes. We're hoping to launch our side business in early September...

Cupcakes by Heather & Joanne
custom creations for all occasions

But more about the business later. Here's what we've been working on this week...

Raspberry Cupcakes


Blueberry Cupcakes


Chocolate Chip Cupcakes


If you haven't entered my CONTEST yet - you have just a week to do so! The contest closes one week from today and the competition is heating up! Head over to the contest post to see what it's all about, and enter to win 200 postcards plus a little something from me!

Tuesday, August 18, 2009

Beaded Wrap Bracelet Tutorial

This is an easy beginning jewelry project for all ages. We just taught it to 6-8 year olds in our Jewelry & Fashion Art class. It's perfect because you can make it as long or short as you want to, and it can be worn as either a necklace or bracelet because of the clasp.


1. Thread two crimping beads on to flexible jewelry wire

2. Thread your clasp on after the crimping beads

3. Push short end of wire back through the crimping beads to form a loop and shorten

4. Use needle pliers to crimp beads and secure loop/clasp

5. Bead away! With this wire you don't need a needle and thread. For this example I just used seed beads but you could use whatever you want. Work with a pattern, or be completely random in your bead selection!

6. Once finished, thread two more crimping beads onto the end

7. Attach other end of clasp in the same way as you did in the beginning, be sure to keep your loop as short as possible

8. Crimp beads

9. Snip wire, and thread any remaining back through the beads

Wear, and enjoy!

Haven't entered my contest yet? Enter HERE to win 200 CUSTOM POSTCARDS. I'll also throw in a little extra handmade something to the winners as well! WHAT ARE YO WAITING FOR? Head over and enter! Good Luck!

Simple Sunflower Card Tutorial


I picked up a sweet clear sunflower stamp in the dollar bin at JoAnn Fabrics last week (have I ever mentioned how much I LOVE those dollar bins?! Yikes!) and it was the perfect inspiration for a quick little card. You could use this same basic template and techniques with any color scheme or stamp you wish. (Click on photo grid to view larger, or simply hop over HERE)


1. Fold a piece of 12x12 cardstock in half, crease with bone folder
2. Divide into three even rectangles. Cut with craft knife or paper cutter to create three cards.
3. Take clear stamp on stamping block and saturate with ink
4. Stamp over front of card, allowing some flowers to go off the page. Set aside.
5. Re-ink stamp, then wipe off center of sunflower with a baby wipe or similar.
6. Color the center of the stamp with washable brown marker
7. Stamp on white paper, then cut around shape with scissors.
8. Make two more sunflowers in the same way.
9. Cut a strip of brown cardstock and place in center of card. Place sunflowers on top.
10. Glue in place. Finished! : )

PS) Have you entered my contest yet?! Come on people - FREE STUFF! Just click HERE.

Monday, August 17, 2009

1st Birthday Party Cupcakes

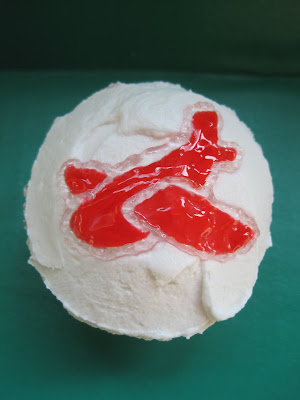
Here are the cupcakes we made for a first birthday (airplane themed) party this weekend!


Friday, August 14, 2009

200 Custom Postcards Printing Giveaway from UPrinting.com


Happy Friday to all! What better way to salute everybody's favorite day of the week and kick of the weekend right than with a CONTEST?

I've teamed up with the wonderful folks over at UPrinting to offer a super easy and fun giveaway:

2 PRIZE WINNERS WILL RECEIVE 200 Custom Postcards

(choose your size: 4x6, 4.25x6, 5x7"); 14pt gloss or matte, 13 pt uncoated. Full Color on both sides (4/4) Shipping must be paid by Winner.

Offer Valid for UNITED STATES SHIPPING ONLY.

To enter, all you have to do is leave me a comment and let me know how you would use these custom postcards if you win! You can personalize your custom postcards for invitations, thank you cards, announcements, holiday greetings, etc. The possibilities are endless!

UPrinting also offers custom greeting cards!

I know that for Heather and I, who are dabbling in a new cupcake business, these postcards would be an excellent marketing tool for us! And what about those of you that have Etsy shops? What a great tool for you! Oh, and don't forget those of you that have birthday parties and events coming up for which you might need thank you notes!

You have two weeks to enter this contest! I'll announce the winners on Friday August 28th!

All you have to do to enter is leave me a comment... good luck!

Wednesday, August 12, 2009

Cake Class Part 1

In an effort to make our cupcakes *that much better* Heather and I enrolled in a Wilton Cake Decorating Class at our local Hobby Lobby. It's four, two-hour classes. Last week was the first class but I had a prior engagement, so Heather represented both of us. It was essentially just talking about materials and supplies so I didn't miss much.

For yesterday's class (class two of four) we had to bring a frosted, decorated cake plus three 1 cup batches of different consistency frosting's with us, ready to work with in class.

Let's be clear. Heather and I bake cupcakes from scratch all the time - but baking and assembling a layered cake? Boy, that's a whole other story.

If we were smart, we would have baked on Monday and frosted on Tuesday...

We're not smart... : )

I won't go into too much of the disastrous cake baking and frosting that took place ALL DAY yesterday but the highlights included: collapsed cakes, underdone cakes, wobbly cakes, and way too thick frosting.

Yikes!

We eventually ended up with two blue cakes. Sort of. As you can see, my cake was incredibly lopsided, and because I'd sandwiched the wrong halves together and we made a really crumbly cake, there were cake crumbs mixed in with the frosting all over the place.


Sigh...

I almost had a temper tantrum and boycotted us going to class. Seriously! I'm a bit of a perfectionist and was NOT happy with our results...

Anyhoo, lucky for us Heather is much more level headed and we made to class we all of our supplies, and our cakes in one piece.

Class was SUCH FUN!

We worked primarily with gels and star tips, although we did some writing stuff as well.


And we got to decorate our cake using a transfer design technique.


Here we are with our finished products!


If you ignore the actual cake on concentrate on the decoration - it's really pretty sweet looking!

And the best part? The instructor said we can bring cupcakes next week! PHEW! : )