
Today please welcome Ashley from The Creative Place. I've featured Ashley's projects on my blog several times, she's so talented and I just love visiting her beautiful space on the web! Enjoy!
Hello! I'm Ashley from The Creative Place and I'm so excited to be sharing a tutorial here at Ready, Set, Craft! I love Joanne's blog - she always has fun crafty projects that are totally inspiring, as well as all of those cupcakes she shares (they always make me drool and want to drop everything and head to the store to get ingredients to make some ;)).
In honor of this week being Earth Week (Thursday is Earth Day!), I wanted to share a tutorial about recycling/repurposing old clothes that are no longer wearable for whatever reason - too worn (like threadbare in places :)), rips or tears that aren't mendable, stains that even oxi-clean won't get out... you get the idea :). So, if you have clothes like this up in your closet, but can't bear to throw them out, this is the project for you! :) All of the clothes I used have some sort of special meaning/significance to myself or my hubby, so this was a fun project to develop! :)
Repurposed Clothes Collage Pillow by Ashley @ The Creative Place
 Supplies:
- Pillow form (whatever size you prefer, I used an 11"x16" form)
- Buttons (optional- if you want to embellish- I ended up not using any buttons, but they're pictured below ;))
- 2 pieces of plain fabric (or more clothes pieces!), each 11" x 11½" (this is for the back of the pillow)
And of course,
- Your old clothes
- Thread
- Ruler, cutting mat and rotary cutter
- Sewing Machine

 First,
I took apart the clothes by cutting them up into pieces I wanted to
feature in the collage (I have strategically avoided showing you the
awful rust and/or marinara sauce stains on my white shirt below ;)). I
used the majority of the necktie (never knew what the inside of a tie
looked like!), the sleeve of a white shirt, a big plain area of one of
my hubby's shirts, the cuff of some PJ pants (which I'm making into PJ
shorts!), and the buttoned up section of a floral shirt.
First,
I took apart the clothes by cutting them up into pieces I wanted to
feature in the collage (I have strategically avoided showing you the
awful rust and/or marinara sauce stains on my white shirt below ;)). I
used the majority of the necktie (never knew what the inside of a tie
looked like!), the sleeve of a white shirt, a big plain area of one of
my hubby's shirts, the cuff of some PJ pants (which I'm making into PJ
shorts!), and the buttoned up section of a floral shirt. I
loved how the floral shirt looked buttoned up, so I decided I wanted to
somehow incorporate the buttons into the collage. I cut a section out
(while it was buttoned) and sewed a straight stitch by the buttons so
it wouldn't come unbuttoned (although, it might be nice for it to be
unbutton-able, you could stash little notes or such about the
ingredients of your collage pillow! ie- what clothes you used and why
they have significance, etc)
I
loved how the floral shirt looked buttoned up, so I decided I wanted to
somehow incorporate the buttons into the collage. I cut a section out
(while it was buttoned) and sewed a straight stitch by the buttons so
it wouldn't come unbuttoned (although, it might be nice for it to be
unbutton-able, you could stash little notes or such about the
ingredients of your collage pillow! ie- what clothes you used and why
they have significance, etc) Once
I cut all of the sections out (make sure all your sections put together
are big enough to cover the pillow- and don't forget to allow for
seams), I arranged them to my liking on the pillow. Ready to start
sewing some more? :)
Once
I cut all of the sections out (make sure all your sections put together
are big enough to cover the pillow- and don't forget to allow for
seams), I arranged them to my liking on the pillow. Ready to start
sewing some more? :) Pin two sections and sew a straight stitch with a 1/4" seam allowance.
 Press the seams open with an iron and keep pinning and sewing the sections together.
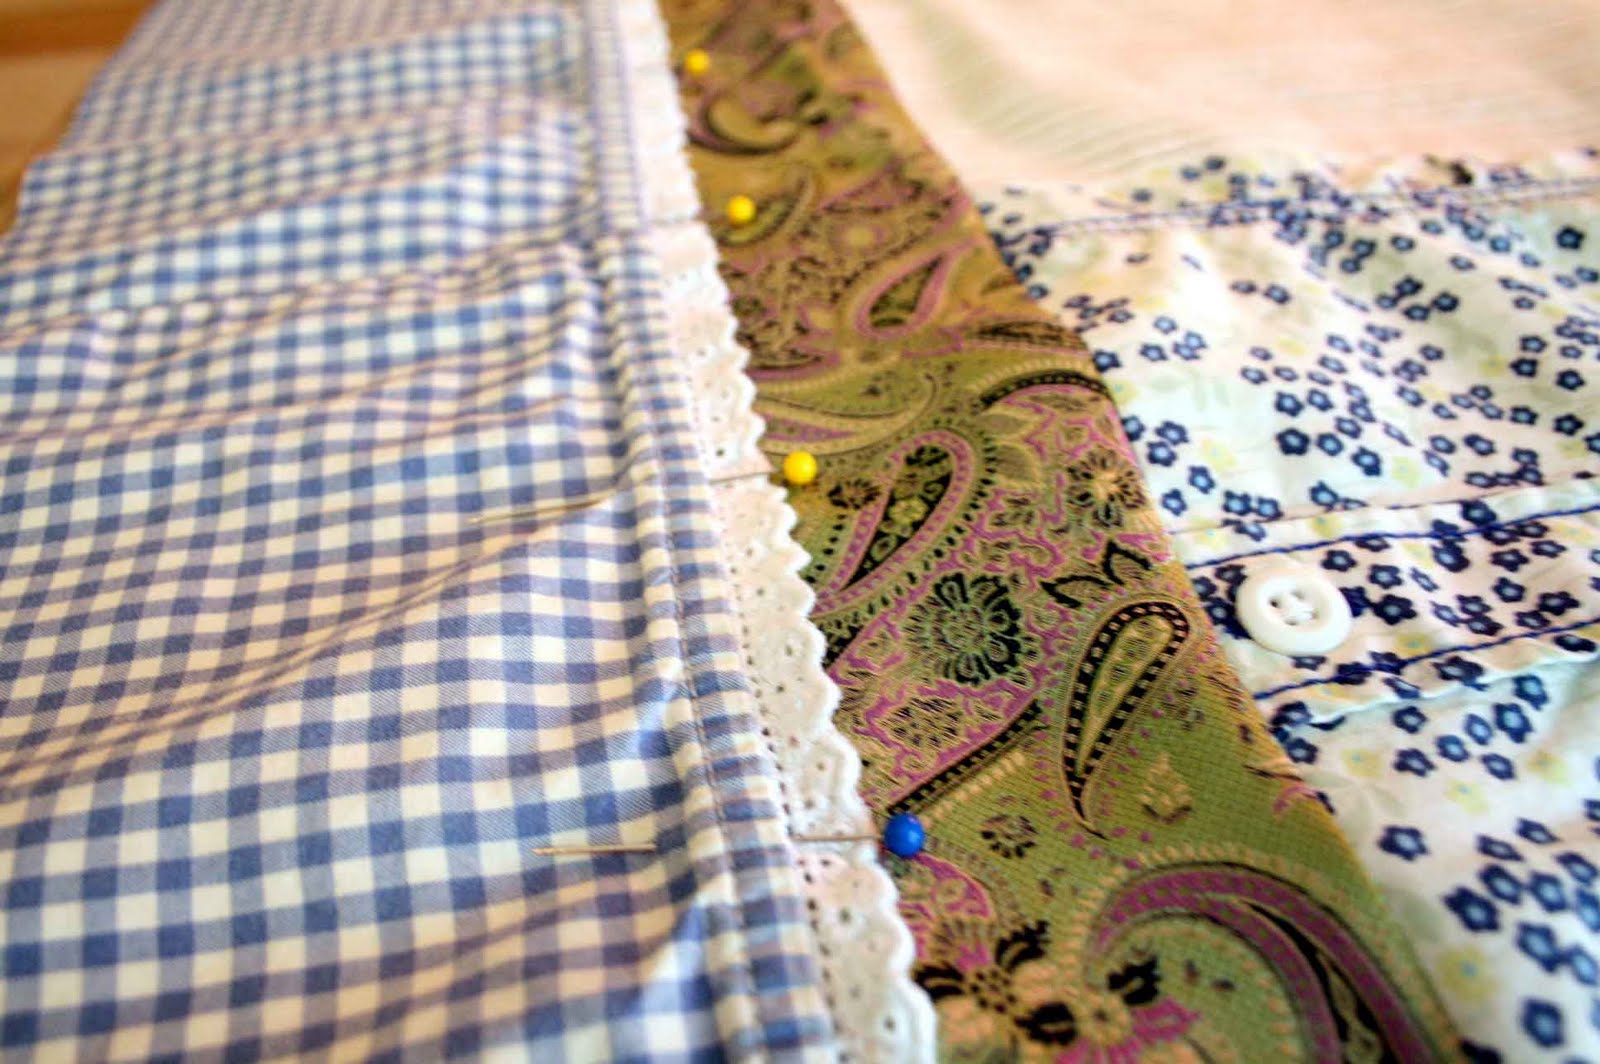 Voilà!
A nice collage! Now, trim off the excess - trim the collage down to the
size of your pillow plus 1/4" on each side. For example, my pillow is
11"x16", so I cut my collage down to a 11½"x16½".
Voilà!
A nice collage! Now, trim off the excess - trim the collage down to the
size of your pillow plus 1/4" on each side. For example, my pillow is
11"x16", so I cut my collage down to a 11½"x16½". Now
let's work on the back of the pillow. I used white linen fabric, but
you could use more clothes or any other durable fabric. Press a 1" fold
onto the long side (11½" side) of each of the back-side fabric pieces.
Sew a straight stitch down the middle of each of the 1" folds
Now
let's work on the back of the pillow. I used white linen fabric, but
you could use more clothes or any other durable fabric. Press a 1" fold
onto the long side (11½" side) of each of the back-side fabric pieces.
Sew a straight stitch down the middle of each of the 1" folds Now, with right sides facing up (flaps will be facing down on the table), layer the two pieces so that the sewn parts are overlapping (see picture).
 Now, put the collage front facing down
on top of the back pieces you just overlapped with right sides facing
up. Pin this together so you have a sandwich (with no meat or cheese,
just the bread ;)).
Now, put the collage front facing down
on top of the back pieces you just overlapped with right sides facing
up. Pin this together so you have a sandwich (with no meat or cheese,
just the bread ;)). Sew a straight stitch all the way around with 1/4" seam allowance.
 Now it's time to flip it! Pull the corners from inside the sandwich to the outside.
 You're almost finished! :)
 Now put your pillow form into the cover :) Voilà! A fun-repurposed-clothes pillow cover!
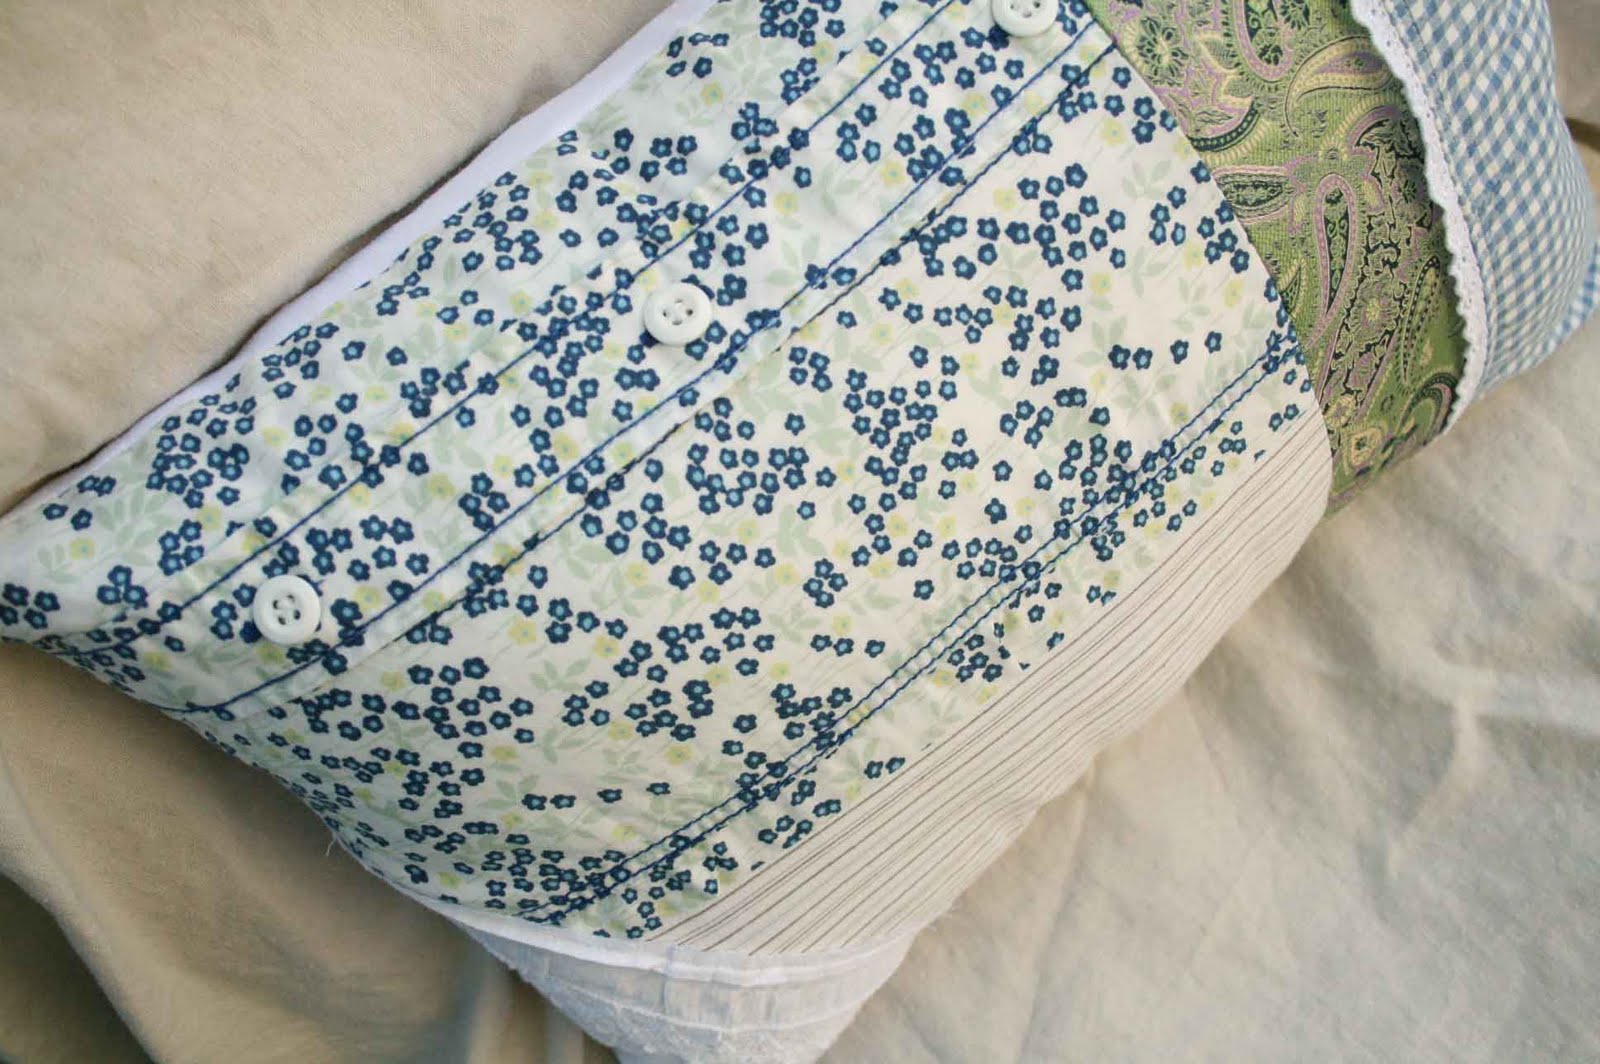
 Thank you so much for having me today! :) Feel free to email me with any questions about the tutorial- thecreativeplace@gmail.com :) Have a fabulous day! :)
8 comments:
What a wonderful pillow. Super-cute!
What a great project- thanks for sharing!
Wonderful! I absolutely love the vintage look. I might have to make a few of those for my mom. They are fabulous!
such a great tutorial! i love the colors in this!
Beautiful project, Ashley! Thanks so much!
This seems a fun idea to reproduce. Wow, now I really want a sewing machine.
Thank you so much for letting me share this tutorial, Joanne! And thank you all for the sweet comments :) I had so much fun making the pillow cover and hope everyone will enjoy making their own too :)
Great!! I love pillows.
Thanks for sharing.
Post a Comment